How to Make Pictures Look Better: Expert Tips at Home
Why Your Photos Fall Flat (And How to Fix That)
Ever had that moment? You snap a picture of what seems like a perfect scene, only to look at it later and feel… underwhelmed. It just doesn't capture the magic you remember. This is a super common experience, and it happens because our eyes see the world with an incredible dynamic range, while a camera lens can only grab one flat slice of that reality. Getting a handle on this difference is your first step toward learning how to make pictures look better.
The great thing is, you don't need to be a professional photographer to close that gap. The demand for high-quality images is booming, which helped drive the global digital image processing market to an estimated $5.16 billion in 2022. That number shows just how many people are learning to turn their snapshots into something special. You can dig into the specifics in this digital image processing market report.
The Three Culprits of Dull Photos
Most photos that don't quite hit the mark usually suffer from one of three main issues. Once you can spot them, you're halfway to fixing them.
- Poor Exposure: This is the big one. Photos that are too dark (underexposed) or blown out and too bright (overexposed) lose critical details. For example, an underexposed photo, even one shot at a low ISO, will look grainy when you try to brighten it in an editor. That's because noise loves to hide out in the dark, shadowy parts of an image.
- Muted or Unnatural Color: If your photo has a weird yellow or blue tint all over, that’s usually a white balance issue. Other times, flat, even lighting can make colors look dull and lifeless, sucking all the energy out of the scene.
- Lack of Sharpness and Focus: Sometimes a photo isn't technically blurry, but it just lacks that crisp, clean definition that makes the details pop. This can happen from a tiny bit of camera shake, a slightly missed focus point, or even something as simple as a smudge on your lens.
Learning to see these specific flaws is much more useful than just slapping on a random filter. Instead of just cranking up the brightness, you learn to lift the shadows while making sure the bright parts of the photo don't get blown out. If you're looking for a quick guide on tools, you can check out our other post about how to improve photo quality online. When you start training your eye for these details, you can make targeted edits that deliver much more polished results.
Choosing the Right Tools Without Breaking the Bank
 The number of photo editing apps and programs out there can feel overwhelming. But here's a little secret: you don’t need the most expensive software to get incredible results. The goal is to find a tool that matches your needs and budget, helping you learn how to make pictures look better without a massive learning curve. Honestly, for most people, free mobile apps are more than powerful enough.
For example, the mobile version of Adobe Lightroom gives you professional-level controls completely free. You can tweak exposure, correct colors, and even make precise adjustments to specific parts of your image. Another one of my go-to recommendations is Snapseed, which is super intuitive and perfect for quickly fixing common photo issues.
When to Upgrade
You should only think about paying for desktop software when you feel like you've hit a ceiling with the free tools. Maybe you need advanced features like layer-based editing for creating complex images, or you need more powerful noise reduction for photos you took in low light. Programs like Adobe Lightroom Classic or Capture One are industry standards for good reason, but they come with a price tag.
Before you pull out your wallet, ask yourself these questions:
- Do I need to edit hundreds of photos in a single batch?
- Am I printing my photos in a large format where every pixel is critical?
- Do I need high-end retouching tools for professional portraits?
If you answered "no" to these, you can get amazing results by sticking with the powerful free options available. The best tool is usually the one you already have and feel comfortable using.
To help you decide, here’s a quick comparison of some popular options, from free mobile apps to professional desktop software.
Popular Image Enhancement Software Comparison
A detailed comparison of leading photo editing software options, including features, pricing, and best use cases.
| Software | Price Range | Best For | Key Features | Difficulty Level |
|---|---|---|---|---|
| Adobe Lightroom (Mobile) | Free (Premium optional) | Everyday mobile editing, learning pro controls | Cloud sync, selective adjustments, presets, color grading | Beginner to Intermediate |
| Snapseed | Free | Quick fixes, intuitive interface for beginners | Healing brush, double exposure, perspective correction, filters | Beginner |
| Adobe Lightroom Classic | Subscription ($9.99/mo+) | Professional photographers, batch editing, library management | Advanced RAW processing, extensive local adjustments, tethered shooting | Intermediate to Advanced |
| Capture One Pro | Subscription or Perpetual License | Studio photographers, superior color accuracy, tethering | Advanced color editor, layers, customizable workspace | Intermediate to Advanced |
Ultimately, whether you choose a free app or a paid program, the key is to pick one and master its features. You'll be surprised at how much you can improve your photos with just a bit of practice.
Making Colors Pop Without Looking Fake
 Color is where many aspiring editors go overboard. We've all seen those pictures with grass so green it looks radioactive and skies that are an unnatural, electric blue. The secret to making colors vibrant is usually about subtlety and correction, not just maxing out the saturation slider. Your first job is often to fix any strange color cast—that odd yellow, blue, or green tint that can make a photo look old or just plain wrong.
This is almost always a white balance problem. For example, a photo taken indoors under regular light bulbs will often have a yellow hue. A quick adjustment toward the blue end of the color temperature scale can instantly make it look more realistic.
Correcting Color Before Enhancing It
Before you even think about making colors pop, you need to establish a neutral and accurate starting point. It’s like painting a room; you’d never apply fresh paint over a stained, discolored wall without priming it first.
- Fix the White Balance: Most editing programs have a "White Balance" or "Temp" slider. If your image looks too warm (yellowish), nudge the slider toward blue. If it’s too cool (bluish), move it slightly toward yellow. The main goal is to make any white objects in your photo look genuinely white.
- Adjust Vibrance, Not Saturation: Instead of reaching for the Saturation tool, which boosts every single color and often makes skin tones look terrible, try the Vibrance slider first. Vibrance is a much smarter tool. It focuses on enhancing the most muted colors while leaving already-saturated colors, like skin tones, alone. This gives you that desired pop without the fake, over-edited appearance.
The technology behind these simple sliders is getting better all the time. The digital image processing market is expected to grow from USD 8.34 billion in 2024 to USD 10.31 billion by 2025, largely because AI is making these adjustments more intuitive. You can read more about these advances in the image processing market to see where things are headed. Once you've corrected the color, you might find the image still needs a little more life. Our guide on using an online image brightener can help you add that perfect final touch.
Getting Sharp Photos That Actually Look Natural
We’ve all seen it: that photo that’s so "sharp" it looks crunchy and unnatural. It’s easy to fall into the trap of cranking up the sharpening slider to save a slightly blurry photo, but this usually just introduces ugly digital artifacts and harsh, glowing edges. The real skill in learning how to make pictures look better is to apply sharpening with precision, understanding exactly what you want to achieve. Are you correcting a bit of motion blur or just trying to bring out the fine details in a landscape?
Before you even think about sharpening, take a hard look at the image for noise. That grainy texture you often find in photos taken in low light can easily be mistaken for a lack of sharpness. Noise loves to hide in the shadows. If you underexpose a picture and then try to brighten it in post-production, you’re basically shining a spotlight on that grain. It’s always a better strategy to use a higher ISO to get the exposure right in the camera rather than underexposing and trying to "fix it in post."
Unsharp Mask vs. High-Pass Sharpening
Once you've managed any noise, it’s time to sharpen selectively. Instead of applying a single sharpening effect to the entire image, it’s better to use tools that offer more control. The Unsharp Mask tool, found in programs like Adobe Photoshop, is a classic for a reason. Despite its confusing name, it works by increasing the contrast along the edges of your photo, which our eyes interpret as increased sharpness.
For even more granular control, the high-pass filter technique is a game-changer. This method isolates the edges in your picture, letting you apply sharpening only to those specific areas. This keeps smooth gradients, like skin tones or a clear blue sky, from getting that gritty, over-sharpened look.
This screenshot from Adobe’s website shows an editing interface where you can make these kinds of precise adjustments. The big takeaway is that professional editing tools are designed to give you this level of control for a reason—it’s the key to achieving sharp photos that still look beautifully natural.
Rescuing Problem Photos With Smart Exposure Fixes
Some of the most satisfying photo edits involve saving images that seemed like lost causes. We've all been there: you take a photo of a friend against a beautiful sunset, only to find they're just a silhouette. Or maybe you captured a great moment, but the harsh midday sun cast unflattering shadows. Learning to correct these lighting issues can salvage photos you might have otherwise tossed.
A common reaction to a dark photo is to just slide the "Brightness" control all the way up. While tempting, this usually backfires. It can wash out the entire image, making it look flat and introducing a grainy texture called noise, especially in the darker areas. A better approach is to work with the light you have, not against it, by making selective adjustments.
Balancing Highlights and Shadows
Instead of a single, blunt "Brightness" tool, think of your editing software as giving you more precise controls. The two most important ones for fixing exposure are the "Shadows" and "Highlights" sliders. They let you target specific parts of the image without affecting others.
- Lifting the Shadows: This tool brightens only the darkest areas of your photo. It's perfect for that backlit portrait scenario. By lifting the shadows, you can make your subject's face visible again without blowing out the already bright sky behind them.
- Recovering the Highlights: This does the exact opposite. If the clouds in your landscape shot look like a solid white patch, pulling down the "Highlights" slider can often bring back the texture and color you thought were gone forever.
To help you decide which technique to use, here’s a quick guide for common lighting problems.
| Lighting Problem | Primary Technique | Secondary Adjustments | Tools Needed | Difficulty |
|---|---|---|---|---|
| Backlit Subject (Dark subject, bright background) | Lift Shadows | Lower Highlights, slightly increase overall Exposure | Basic photo editor (e.g., Adobe Lightroom, Photos app) | Easy |
| Overexposed Sky (White or washed-out sky) | Lower Highlights | Increase Contrast, slightly boost Saturation in blues | Basic to advanced photo editor | Easy |
| Harsh Midday Shadows (Strong, dark shadows on faces/objects) | Lift Shadows | Lower Contrast, slightly soften with a Clarity/Texture slider | Basic photo editor | Medium |
| Generally Underexposed (Entire photo is too dark) | Increase overall Exposure | Lift Shadows, add a touch of Contrast to avoid flatness | Basic photo editor | Easy |
| Low-Light "Noise" (Grainy texture in dark areas) | Use a Denoise tool | Carefully lift Shadows, avoid over-sharpening | Advanced editor with noise reduction (e.g., Lightroom, Topaz Photo AI) | Medium |
Mastering these exposure controls is a fundamental step toward knowing how to make pictures look better. The infographic below shows how small, balanced changes can make a big difference.
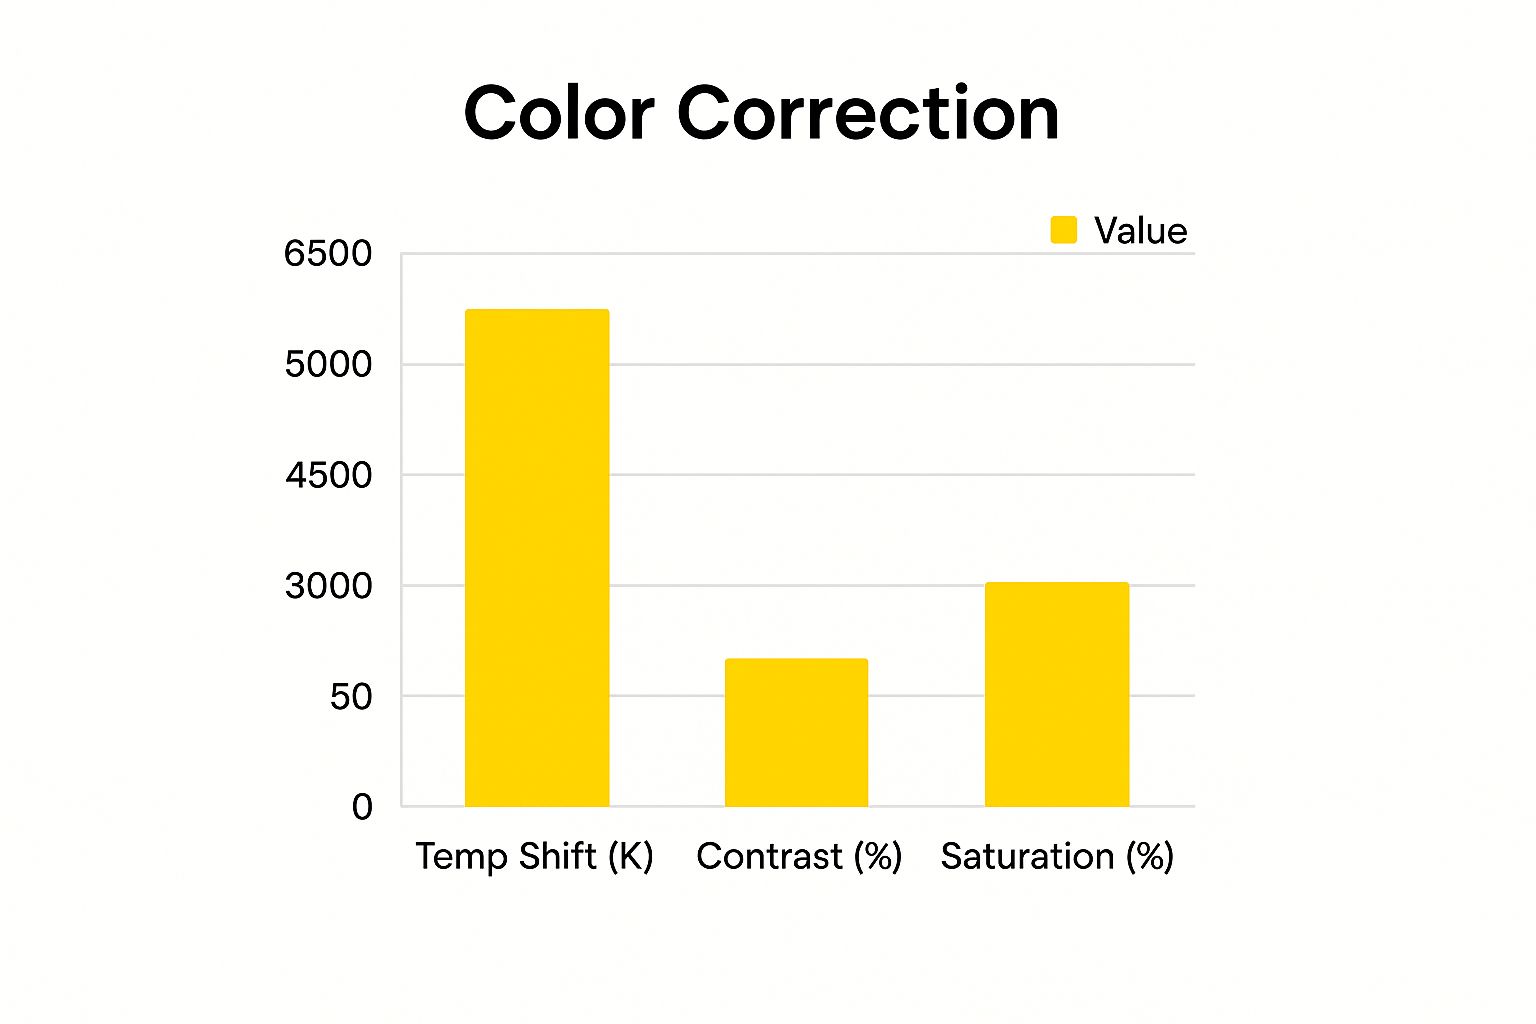
As you can see, a little boost in contrast and saturation, paired with the right color temperature, creates a much more dynamic result. These skills are incredibly valuable. The digital image processing market is projected to hit USD 37.5 billion by 2033, and editing software made up over 65% of that market in 2023. You can explore more about these digital image processing market trends to see how important these tools have become.
By getting comfortable with these simple exposure adjustments, you’ll be well-equipped to turn disappointing photos into images you’re proud to share.
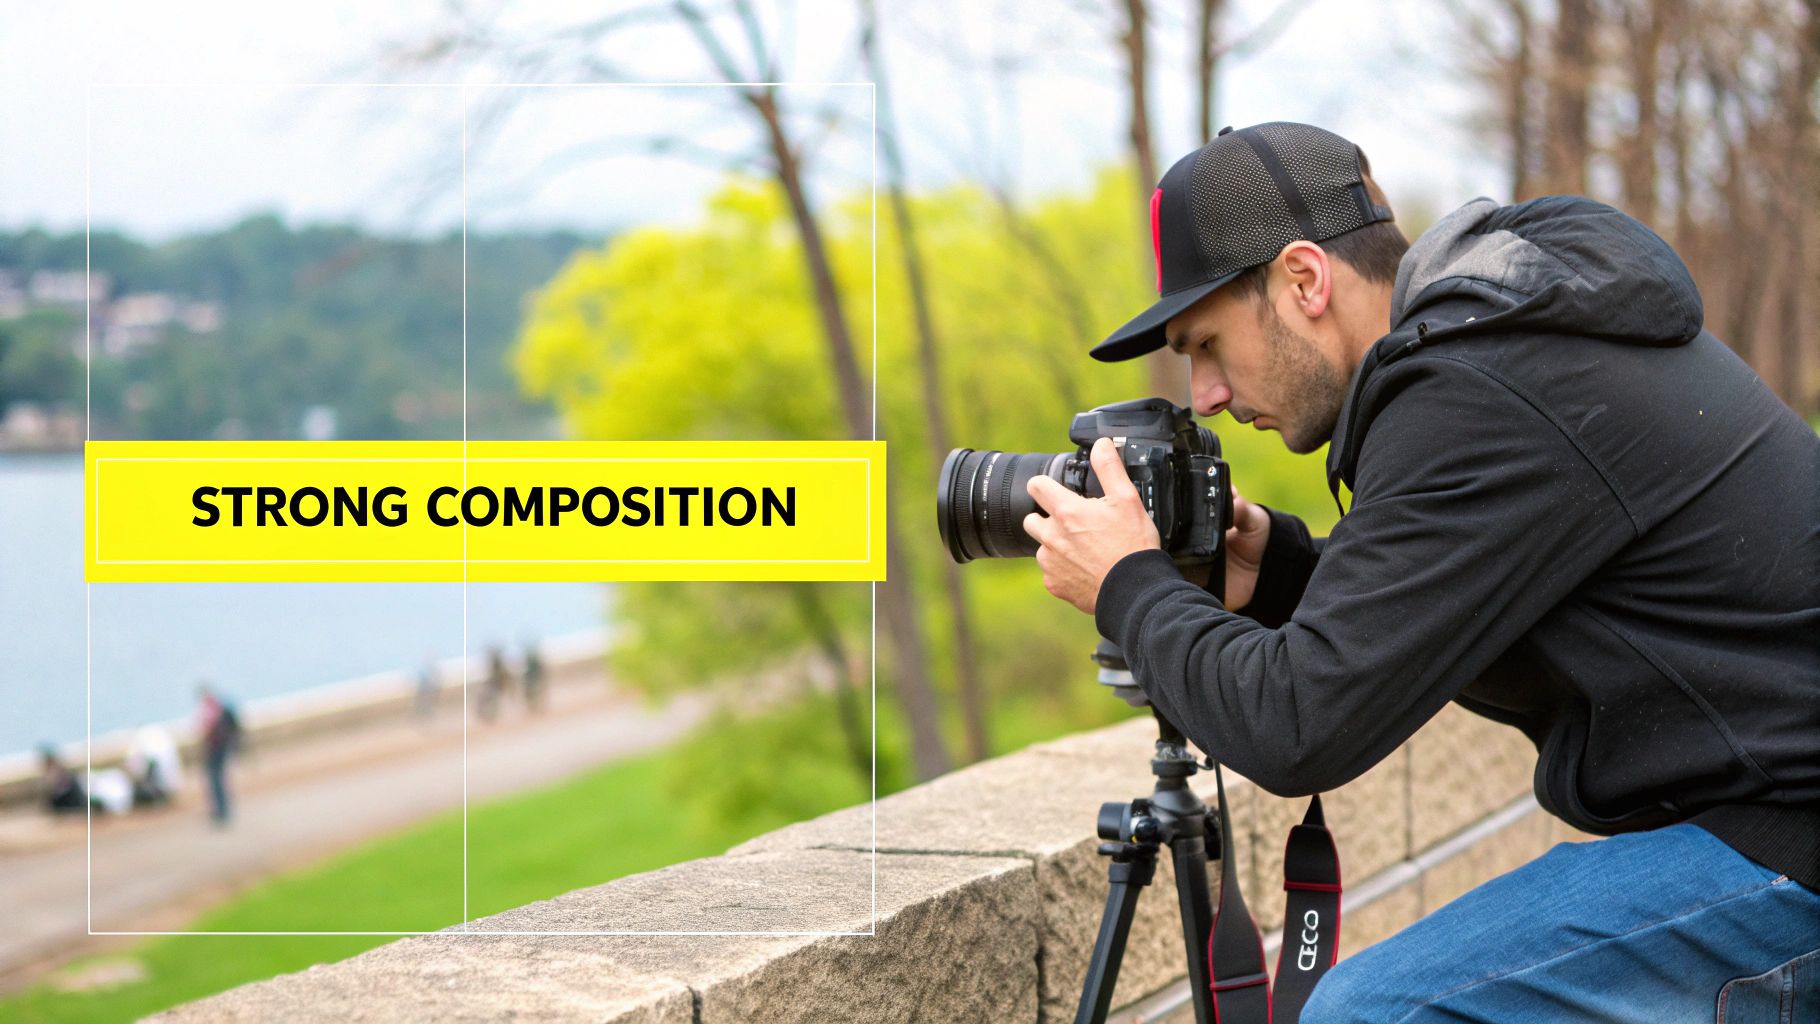
Cropping and Composition Tricks That Transform Images

Once you've tweaked the color and exposure, the single most powerful way to improve a photo is by refining its composition. A quick crop can completely change the vibe of your picture, turning a messy snapshot into a compelling, focused image. It's not just about cutting things out; it’s about deciding what really belongs in the frame.
Straighten Up and Frame Right
Have you ever noticed how a photo with a slightly tilted horizon just feels… off? Whether it's a beach scene or a picture of a room, a crooked shot is an instant giveaway of an amateur photo. The good news is that it’s an incredibly easy fix. Almost every photo editing app has a straightening tool, usually with a handy grid to help you get those horizontal and vertical lines perfectly aligned.
Next, let's talk about the Rule of Thirds. Picture your photo with a tic-tac-toe grid over it. Instead of placing your subject right in the center, try positioning it along one of the lines or at an intersection point. This simple shift creates a more dynamic feel, encouraging the viewer's eye to explore the entire image instead of just staring at the middle.
Declutter with a Purpose
Now, take a hard look at the edges of your photo. See that random car bumper, a stray tree branch, or half of a person photobombing your perfect shot? Be ruthless and crop them out. Removing these distractions instantly cleans up your picture and puts all the focus where it should be—on your subject.
This is your chance to remove everything that doesn't add to the story. Don't be shy about playing with different aspect ratios. A tight vertical crop can add a lot of drama to a portrait, while a wide, panoramic crop might be just the thing to make your landscape shot truly epic.
Your Personal Photo Enhancement System
Now that you've seen the individual tools, let's talk about putting them all together into a reliable workflow. Knowing how to make pictures look better isn't about just clicking buttons and hoping for the best; it’s about having a system you can count on. A consistent process saves time, prevents you from getting frustrated, and helps you steer clear of common issues like over-editing. The trick is to work like a pro: start with the big, foundational changes and then move to the smaller details.
Global Adjustments First
You should always begin with edits that impact the entire image. This gives you a solid base to build upon before you get lost in the nitty-gritty. I like to think of it as pouring the foundation for a house before you start picking out paint colors for the walls.
- Lens Correction and Cropping: The first thing I do is fix any lens distortion and make sure the horizon is straight. After that, I crop the image to improve the composition. This is the perfect time to get rid of distracting elements on the edges and frame your subject just right. It saves you from editing parts of the photo you might just crop out later.
- Exposure and White Balance: With the framing set, it's time to tackle the overall lighting and color. Fix any obvious problems, like a photo that’s too dark or has a weird yellow tint. The goal here isn't perfection just yet, but to create a balanced, neutral starting point. A major reason photos look grainy is from being underexposed in the camera and then trying to brighten them in post-production. Try to get a good exposure from the get-go.
Local Adjustments and Finishing Touches
Once your foundation is solid, you can start enhancing specific parts of the photo. This is where you can get more creative and really make your image pop.
- Targeted Enhancements: Use tools to lift shadows in one area or bring back details in bright highlights without messing up the rest of the picture. This is also your chance to make specific colors, like a blue sky or green grass, look more vibrant and alive.
- Sharpening and Noise Reduction: Sharpening should be one of the very last things you do. If you apply it too early, you'll just end up sharpening any noise or imperfections you haven't fixed yet. I always apply it selectively to areas that need that extra bit of definition, like a person’s eyes or the texture on a historic building.
Creating a system like this takes the guesswork out of editing. You’ll begin to trust your own eye and know exactly what to do to improve any photo that comes your way. For more tips on taking your images to the next level, take a look at our guide on finding a great photo enhancer for free.
And if you have a great photo that's ruined by an annoying text caption, SnapCaptionRemover can clean it up in an instant. Give our free tool a try today and get a clean, polished image in seconds.